Showing posts with label Carta Bella. Show all posts

Friday, December 22, 2023

Merry Christmas To All!

 Hello!

Are you ready for Christmas?

Today I am sharing a layout I created for Creative Embellishments using Carta Bella Farmhouse Christmas along with some Creative Embellishment chipboard. This photo was taken at my Mom's on Christmas Eve last year with 2 of my sisters, a few nieces, my Mom, my kids and I. 


I added patterned papers to the bottom of the white background tearing the edges and machine stitching them in place. I added my photo. I inked the Christmas Gnomes and added them to both sides of my photo:


I love the Merry Christmas To All chipboard piece and inked it for my title. I fussy cut some shelves from one of the papers and added them to my page:


I also fussy cut the trees and flowers. I added a few stickers to the gnomes hats:


This was such a fun layout to create and I will treasure it since it is the last holiday we will be celebrating in this house. My step dad passed away and we had to sell the house and move my Mom into a memory care unit.
Thanks for stopping by and I hope you have a wonderful Christmas filled with, family, friends and lots of love.


Thursday, November 30, 2023

A Fun Advent Calendar

 Hey there Creative Friends!

Today I am sharing an advent calendar I created using patterned papers from Carta Bella, Echo Park and Recollections. I also used lots of Creative Embellishments chipboard and some of their acrylic pieces to decorate the individual boxes. 

I used this video to create my advent calendar, but changed the spine part of it up a bit with things I learned creating prior mini albums.
On the cover, I used:
Tree Shaker (filled with Buttons Galore & More and glitter from my stash)


Here's a view of the spine:


A view of the book opening. I used ribbon from my stash to tie a bow and that holds the book shut:


A few close ups of the cover embellies:


This is what it looks like open:


There are 24 handmade boxes. I placed a Coffee/ Cocoa Mugs Countdown piece on each box. Here's the left side:


Here's the right side:


On some of the boxes, I added a bit more:
 #2 has a Jingle Bell


#10 has a Jingle Bell
#11 has a stocking sticker


#14 has a candy sticker


#16 has a mistletoe sticker


I used inks, Nuvo Glitter Marker, Sharpie and Stickles to color the chipboard pieces.
I had a blast creating this fun advent calendar and I am working on another one to possibly share with you soon.
Thanks for stopping by and have a great day!


Monday, July 17, 2023

Christmas In July Album

Hi everyone! 
I am back to share another album I created for Creative Embellishments. I will call this one Christmas in July, lol! I am having so much fun with these albums!  This one is bigger than my last two. This one measures 9x10". I used the tutorials by Bev Code once again along with lots of Creative Embellishments chipboard and Carta Bella Christmas and Happy Christmas collections. I used ink pads, a red Sharpie and various mists to color the chipboard.

I am back with a hand made Christmas album that I created for Creative Embellishments I will call it Christmas in July, lol! I am having so much fun with these albums!  This one is bigger than my last two. This one measures 9x10". I used the tutorials by Bev Code once again along with lots of Creative Embellishments chipboard and Echo Park Christmas and Happy Christmas collections. I used ink pads, a red Sharpie and various mists to color the chipboard. On the cover, I used: Christmas Bulb, Poinsettia Set, Prancing Deer, Tiny Tag, Have A Holly Jolly Christmas 2, Chipboard Snowflakes and the Noel is a custom size piece that Nicolle created. I cut a berry off and added that to the inside of the poinsettia:


 I fussy cut the wreath from one of the papers and layered the chipboard pieces on, under and around it. I also fussy cut the deer and tucked it in. I added some Divine Twine to the Tiny Tag:


 I decided to use a few different mists and inks to the Have a Holly Jolly Christmas 2 piece and I love how it came out! I added some sheer ribbon from my stash to the Christmas Bulb. I added lots of watered down white acylic paint spatters to this album. Snowflakes aren't brown, but I thought they matched and I could get away with it, lol.


Page 1 has a booklet that pulls out. I added the Scrawny Tree and the Merry Christmas Sentiment. Page 2 has two booklets tucked in. I added the Baubles to one and the Deer Blank to the other.


 Here's a close up of the Baubles. I used Heidi Swapp gold colorshine to paint them. When that was dry, I added light modeling paste through two CE stencils- Snowflake and Twinkle Star. I love how this looks!


 I colored the Christmas Wreath and then added a red Bow on top:


Page 3: Merry Christmas ATC Coin and a wood veneer Tree Page 4: Christmas Light Strand 2 and a Christmas Sentiment (Mistletoe)


 I received this tag in a swap over 10 years ago from a scrappy friend named Jan. I always loved it and thought it was perfect for this album. Check it out, isn't it awesome? It originally had small red sparkly Joy over the green joy but somewhere in those 10 plus years I lost the "y", so I replaced it with the red bling:


This is the inside of page 4 & 5. There is lots of room for photos:


Page 5: Christmas Train & Peace is another custom word Nicolle created. Page 6: Christmas Wreath, Bow and Snowflake Banner


Here's a close up look at that cute Christmas Train:


 A close up of the Christmas Wreath and Bow:


Page 5 has a booklet that pulls out. I added a Shine ATC Frame and a Scribble Light to it. Page 6 opens like this and I also added part of the Snowflakes Border here.


 I really enjoyed creating this album and I love how it came out! Thanks for stopping by and have a great day!

Friday, December 23, 2022

Sunflower Field

Hey there Scrappy Friends!

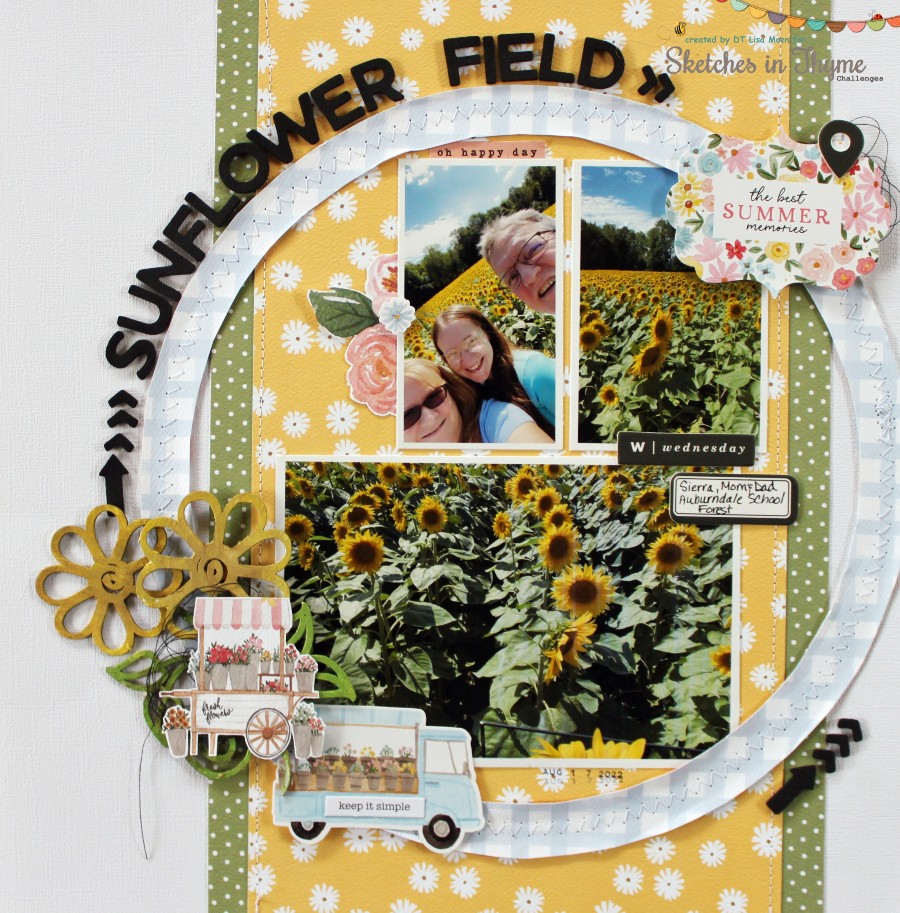
Today I am sharing a layout I created for Sketches In Tyme using sketch #546 along with Carta Bella Summer collection. The FFA teacher at Auburndale High School, where I graduated from, does so many things with the ag program. He and the students plant a field full of sunflowers every spring. I have been wanting to go check it out, we did and it was amazing!


I added strips of patterned papers down the middle of my page like in the sketch.Then added some maching stitching. I cut a circle from patterned paper and placed that on top, tucking my photos in the middle like the sketch. I added a zig zag stitch with my sewing machine. I used foam Thickers for my title:

I added gesso and acrylic paints to Creative Embellishments Funky Flowers and placed them in the lower left hand corner of my photos. I tucked in some tangled thread and then added the fussy cut flower cart on top along with the flower van sticker from the Summer collection. I placed a word phrase sticker from Teresa Collins on the van:


In the upper right side by the photos, I added a framed sticker with sentiment, some tangled thread and the "you are here" symbol is from Becky Higgins. 


Here is the sketch:


As you can see, I followed the sketch, except I added a few clusters of embellishments.
Looking forward to seeing your take on this sketch!
Thanks for stopping by and I hope you have a wonderful Christmas with lots of family and friends!


Wednesday, December 7, 2022

Have Yourself A Merry Little Christmas

 Hey there!

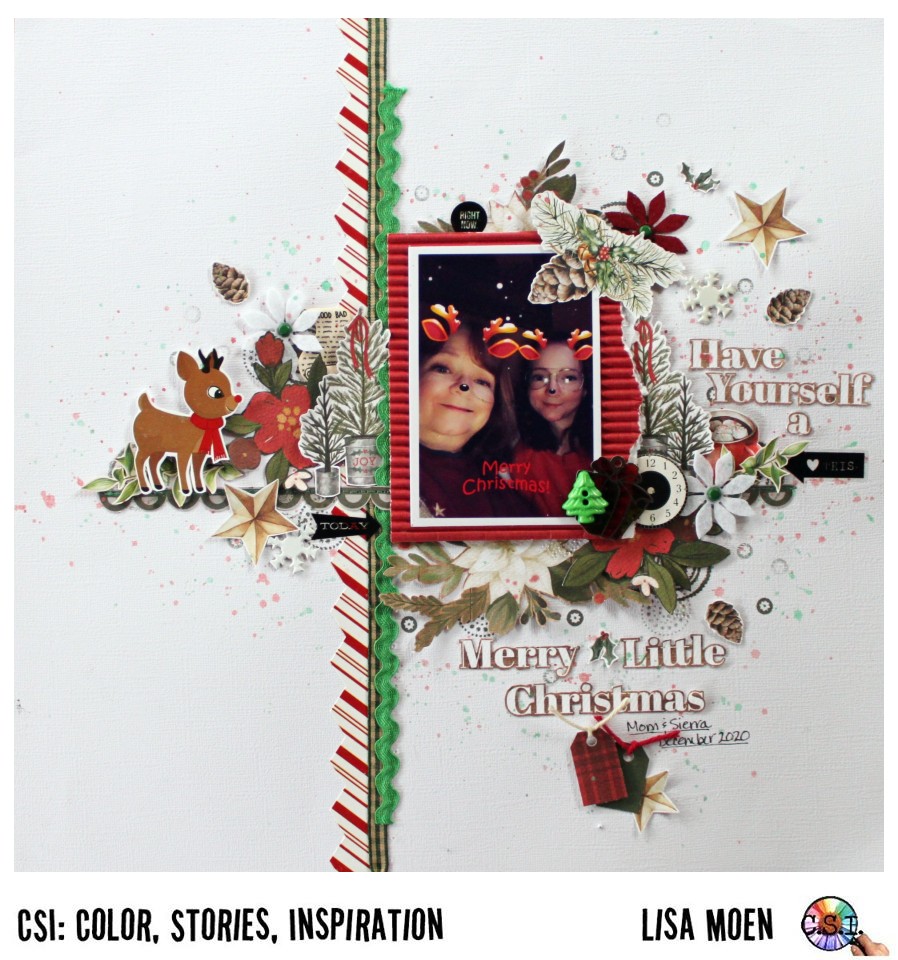
Today I am sharing my take on case file #400 at CSI. I used lots of my Christmas stash for this page of Sierra and I on Christmas Day of 2020:


I used all the evidence of my page from the case file! WooHoo!
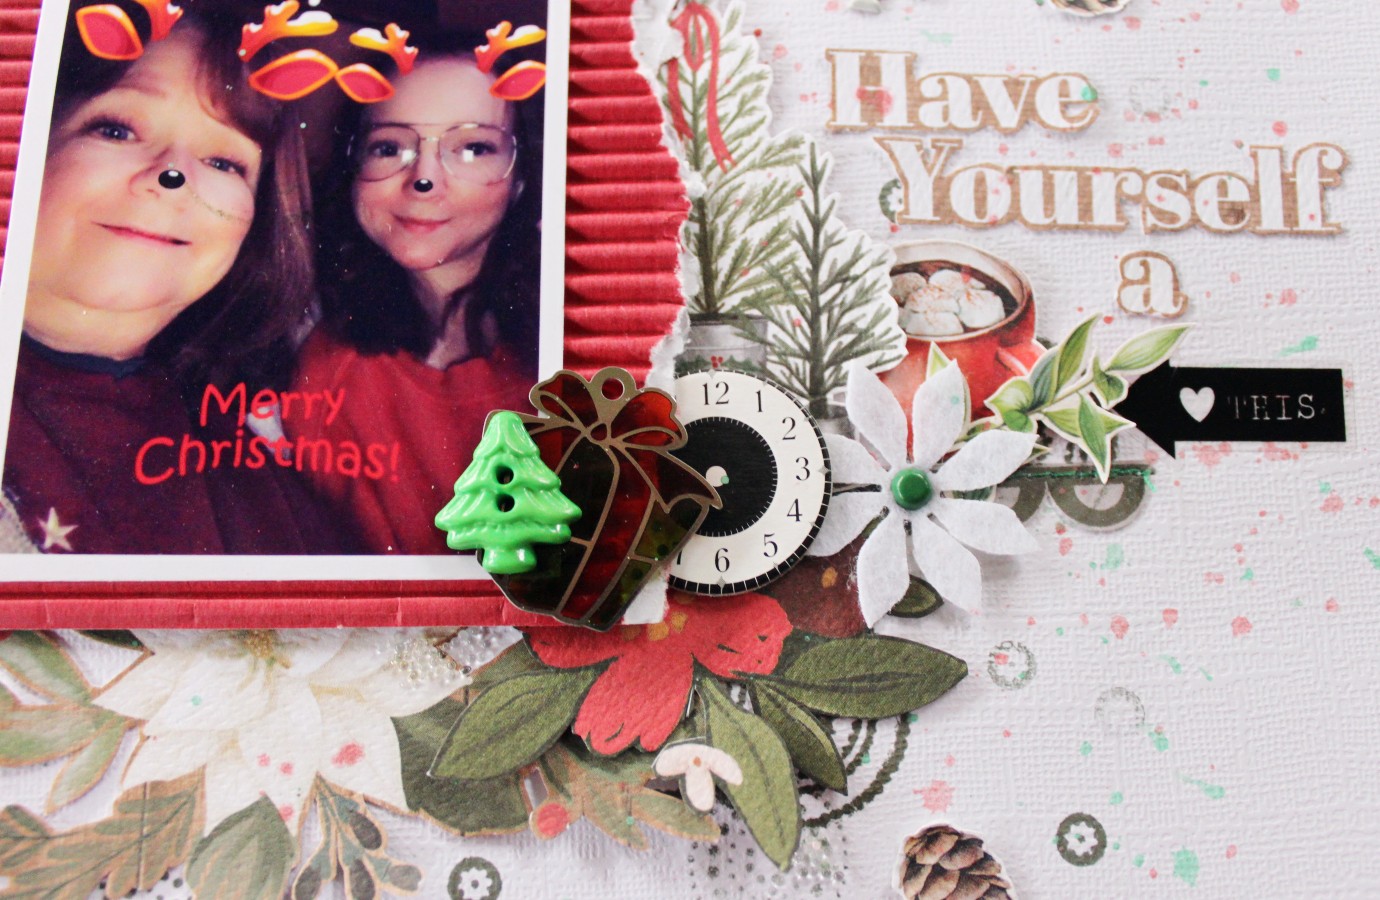
I started my page with a border sticker from Echo Park, running it down my page. Next to that, I added in a gingham ribbon along with some ric rac. I placed my photo on corrugated paper from Fancy Pants and popped that up on some craft foam. I fussy cut the trees from a paper from Carta Bella Farmhouse Christmas. I added in the red fussy cut red flowers from CartaBella Hello Christmas. The stars and pinecones were fussy cut from a paper from Mintay Home For Christmas and the leave branches were from Mintays' Merry & Bright collection. I also tucked in a felt poinsettia, snowflake brad, wish list button and some Simple Stories black clear word stickers:


Here I added more of the fussy cut items along with another snowflake brad and a maroon felt poisnsettia. I added watercolor paint spatters and stamping to the background:


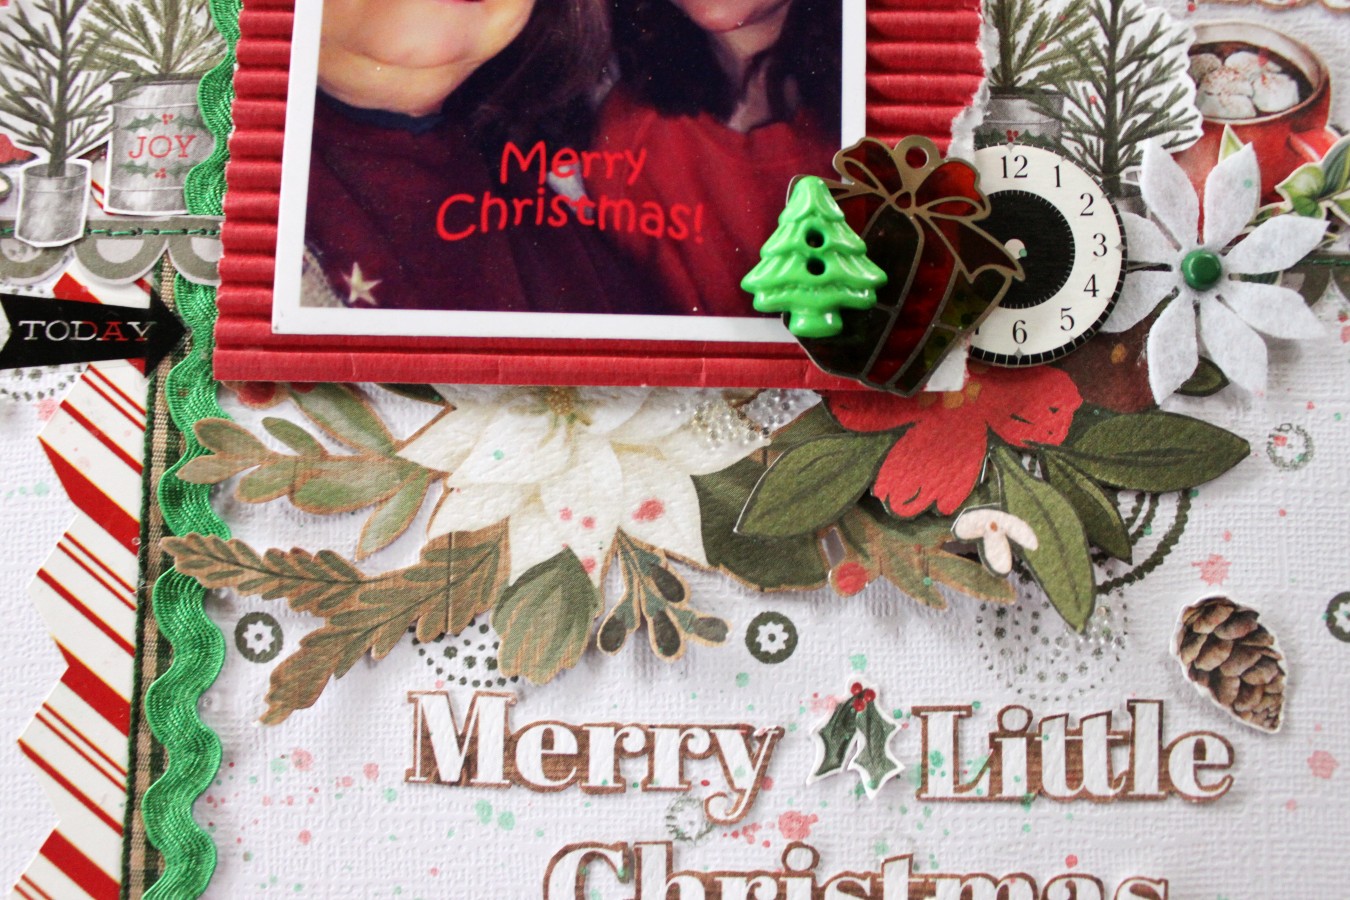
I fussy cut the title and mug from papers in the Mintay Home For Christmas collection. I added another felt poinsettia, fussy cut trees and leaves. I fussy cut the white flower cluster from a paper from Carta Bella Farmhouse Christmas. I added in a chipboard clock, the gift and the tree button, all are from my stash. I used RG ink and a stamp from American Crafts to stamp the scalloped border. Then I fussy cut it and added it to my page:


You can see the stamping on my background better here. I am not sure who the manufacturer is of the stamps as these were a gift and it didn't have any packaging. Here's the rest of my titla and some small tags I handcut and added some twine through:


If you look closely, peeking out of the bottom of the photo on the white flower and also on the stamped circle, I have added some beads:


Here's a quick look at the case file, check out the CSI Facebook page to see the evidence and testimony:


Thanks for stopping by and have a great day!


Tuesday, December 6, 2022

Large Christmas Tag

Hey there crafty friends!
I am back to share a beautiful holiday decor Christmas tag with you that I created for Creative Embellishments.  I enjoy creating holiday decor with all the fun large chipboard and wood pieces from Creative Embellishments!
For this project, I used the Large Christmas Eve Tag as the base. I thought about adding faux snow to create a shaker in between the 2 layers of the tag but opted just to add the black snowflake paper from Carta Bella Happy Christmas in between:


 I used inks, Sharpies and Nuvo Glitter Markers to color the tag. I fussy cut some flowers from the Carta Bella collection and added a cluster to the top left. I added ribbon from my stash:


 I love the scene on this fun tag, santa and his reindeer, love it! I also loved the sentiment on this wreath sticker:


 I added bling from My Minds Eye to the tree on the tag. I placed a Whimsical Tree on top:


 I added patterned papers to the presents on the tag. I fussy cut some more flowers and added them to the bottom right corner. I tucked in a few Jingle Bells and tied a ribbon on the larger one. I added the Merry Christmas at the bottom. Finally, I added some white acrylic paint spatters:


This was such a fun project to create and I love how it came out! 
 Thanks for stopping by and have a great day!